This post may contain affiliate links to products or materials that I have personally used or endorse. All opinions expressed are mine. Please see my disclosure policy here.
“ The most wonderful thing about Tiggers is, I’m the only one. .” —Tigger
Here is the final block in a series of four graph patterns, for a Winnie the Pooh themed baby blanket. This is Tigger, the bounciest member of the crew! I love me some Tigger, he’s always so happy and full of energy! As I mentioned in the first post for the Winnie the Pooh block, I finished creating these graphs almost a year ago, but am just now able to post them due to coronavirus imposed vacation.
This pattern uses the corner to corner (C2C) method to create the blanket picture. I won’t write it out step by step or create another tutorial, but I will direct you to Repeat Crafter Me‘s C2C tutorial video HERE or to Crochet Crowd‘s video HERE. Both are excellent tutorials that I used to learn this method.
Here is a picture of the finished block:

You will find the pattern graph below, or you can purchase the convenient ad-free printable PDF in my Etsy shop, HERE.
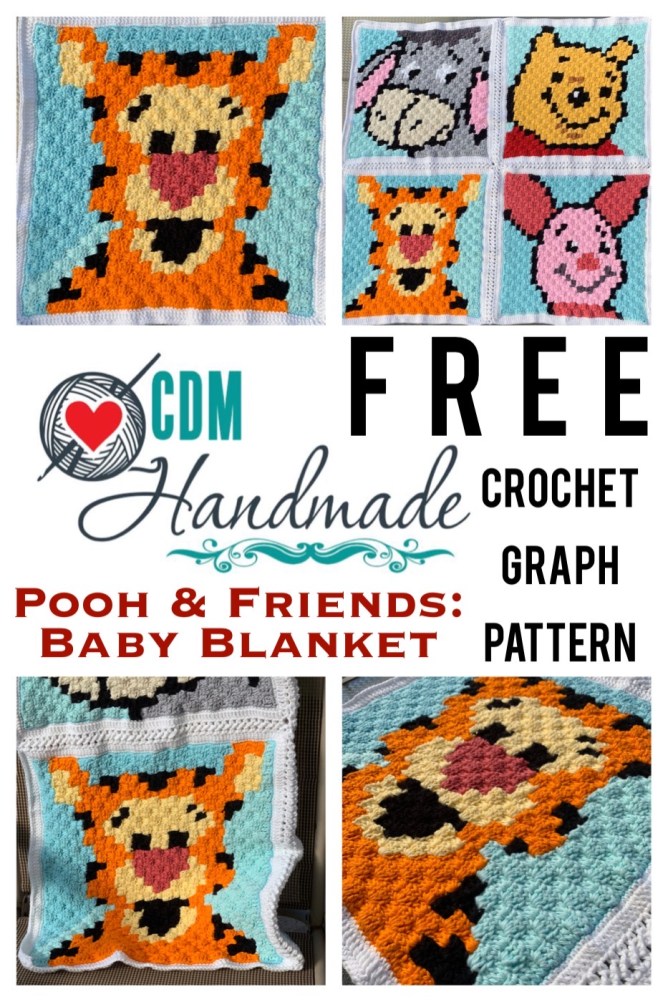
Pooh Bear and Friends Baby Blanket – Tigger
Skill level: Intermediate
Abbreviations:
- sl st – slip stitch
- ch – chain
- sc – single crochet
- dc – double crochet
Materials required:
Yarn – I Love This Cotton, colors: Black, White,Buttercup, Glowing, Aqua, Rosey II
Yarn needle
Scissors
Crochet hook G (4.0mm) – I used my favorite Clover Amour hook
Pattern:

Start in any corner, whatever your preference is. Use the corner to corner method to complete the graph. After completing the last corner (using the Aqua background color) do not finish off.
Border:
Row 1: ch 1, sc all along the first edge, evenly spacing your stitches. I used 2 sc into the side of each square and 1 sc into the space between squares. In each corner, 1 sc, ch 1, 1 sc, then repeat around entire square. Slip stitch into first sc, fasten off.
Row 2: join with white yarn, sc into each stitch all along first edge. In each corner, 1 sc, ch 1, 1 sc, then repeat around entire square.
Row 3: ch 2, dc into each stitch all along first edge. In each corner, 1 dc, ch 1, 1 dc, then repeat around entire square. Fasten off.
This is the final block in the series of four graphs! I will be back next week to share completed pictures of the whole blanket and the joining methods used.
Thank you for visiting my blog! You can help support CDM Handmade and ensure more great patterns in the future by sharing this post, making a purchase with my affiliate links (at no additional cost to you) or purchasing the convenient ad-free printable PDF of this pattern from my Etsy Store HERE. Happy hooking!
Shopping List: